Certainly! Click now to see the full download manual……
- lawnmowers Water Pump Fits Case / Fits IH 885 Fits David Brown K262898 K925067 K952713 New Water Pump Fits Case / Fits IH 885 Fits David Brown K262898 K925067 K952713 E-mail: info@isparts.com You can get help …
- Case Study – 2008 Dodge 1500 Multiple Misfires – Exceeding My Diagnostic Ability Diagnosing multiple cylinder misfires on a 2008 Dodge 1500 with the 3.7L V6. In trying to figure it out, I bump up against my …
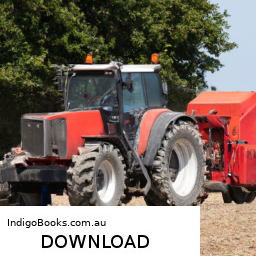
Shifting forks are crucial components in the transmission of a Case 1500 or 1800 tractor, as they play a key role in engaging and disengaging the gears. Replacing these parts can seem daunting, but with the right tools and a systematic approach, you’ll be able to tackle this task. Let’s break down the process step by step, ensuring that we cover every aspect in detail.
### Tools and Materials Required
1. **Basic Hand Tools:**
– **Socket Set:** A complete socket set (preferably metric and SAE) will be essential for removing the bolts that hold the transmission cover and other components in place.
– **Ratchet Wrench:** This will help you quickly remove and tighten bolts.
– **Torque Wrench:** To ensure that bolts are tightened to the manufacturer’s specifications.
– **Flathead and Phillips Screwdrivers:** For prying off covers and removing screws.
– **Pliers:** Needle-nose and regular pliers can be useful for various tasks, including removing clips or wiring.
2. **Specialized Tools:**
– **Gear Puller:** This tool is useful for removing gears that are stuck or need to be removed without causing damage to the surrounding components.
– **Clutch Alignment Tool:** If you need to disturb the clutch during this process, this tool will help realign it correctly upon reassembly.
– **Magnetic Pick-Up Tool:** To retrieve any dropped hardware or components from hard-to-reach areas.
3. **Lubricants and Cleaners:**
– **Parts Cleaner:** A solvent or degreaser will be necessary for cleaning components before reassembly.
– **Gear Oil:** Make sure to have the right type of gear oil for refilling the transmission after the job.
– **Thread locking Compound:** This can be used on bolts to prevent them from loosening over time.
4. **Safety Equipment:**
– **Safety Glasses:** Always wear eye protection when working on machinery.
– **Gloves:** To protect your hands from sharp edges and harmful substances.
– **Steel-Toed Boots:** To protect your feet from heavy components that may be dropped.
### Step-by-Step Procedure
#### Step 1: Preparation
1. **Park the Tractor on a Level Surface:** Ensure that the tractor is on a flat area to prevent it from rolling. Engage the parking brake for safety.
2. **Disconnect the Battery:** Always disconnect the negative terminal of the battery to prevent any electrical shorts or accidental engagement of the starter.
3. **Drain the Transmission Fluid:** Locate the drain plug on the transmission housing. Using a socket wrench, remove the plug and allow the fluid to drain completely into a suitable container. This is important to avoid spills and ensure a clean workspace.
#### Step 2: Accessing the Transmission
1. **Remove the Floor Plate:** Depending on your model, you may need to remove the floor plate or the console that houses the gear shifter. This usually involves unscrewing several screws with your Phillips screwdriver.
2. **Disconnect Linkages:** Carefully disconnect any linkages or cables connected to the gear shifter. Label these components as you go, so reassembly is easier.
3. **Remove the Transmission Cover:** Use your socket set to remove the bolts securing the transmission cover. There may be a few bolts hidden under the cover, so be thorough in your inspection. Once the bolts are removed, gently pry off the cover with a flathead screwdriver if it doesn’t come off easily.
#### Step 3: Inspecting and Removing the Shift Forks
1. **Locate the Shift Forks:** Once the cover is removed, you’ll see the internal components of the transmission. Identify the shift forks, which are usually mounted on a shaft and engage the gears.
2. **Remove Any Obstructions:** If there are any gears or other components blocking access to the shift forks, carefully remove them using the gear puller if necessary. Be cautious not to damage the gears during this process.
3. **Remove the Shift Forks:** The shift forks are typically attached with bolts or pins. Using your socket set or pliers, remove these fasteners. Take note of how the forks are positioned, as you will need to replicate this during reassembly.
#### Step 4: Installing New Shift Forks
1. **Prepare New Shift Forks:** Before installing the new shift forks, compare them to the old ones to ensure you have the correct parts. Clean the area where the forks will be installed to remove any debris or old lubricant.
2. **Install the New Shift Forks:** Position the new shift forks in the same orientation as the old ones. Secure them using the original bolts or pins, ensuring they are tightened to the manufacturer’s specifications using a torque wrench.
#### Step 5: Reassembly
1. **Reattach the Gears:** If you had to remove any gears, carefully reinstall them, ensuring they are seated properly.
2. **Replace the Transmission Cover:** Carefully place the transmission cover back on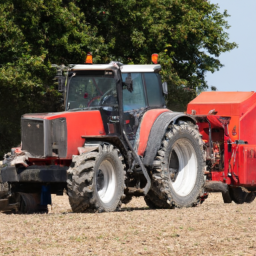 and secure it with the bolts. Be sure to replace any gaskets to prevent leaks.
3. **Reconnect Linkages:** Reattach all the linkages and cables you previously disconnected. Double-check that everything is positioned correctly.
4. **Reinstall the Floor Plate:** Secure the floor plate or console back in place.
#### Step 6: Final Touches
1. **Refill Transmission Fluid:** Locate the fill plug on the transmission. Using the appropriate gear oil, refill the transmission to the recommended level.
2. **Reconnect the Battery:** Once everything is back in place, reconnect the negative terminal of the battery.
3. **Test the Operation:** Before taking the tractor out for a full operation, start it and test the gear shifting to ensure everything is functioning correctly.
### Conclusion
Replacing the shift forks in a Case 1500 or 1800 tractor is a detailed process that requires careful attention to detail and the right tools. By following these steps methodically, you can effectively replace the shift forks and ensure your tractor operates smoothly once again. Always remember to consult the tractor’s service manual for any specific instructions or torque specifications related to your model. Happy wrenching!
A fuel pressure regulator is a critical component in a vehicle’s fuel delivery system, responsible for maintaining the optimal fuel pressure supplied to the engine’s fuel injectors. Its primary function is to ensure that the fuel rail—the component that distributes fuel to the injectors—receives a steady and appropriate pressure, regardless of variations that may occur due to changes in engine demand or fuel pump output.
Typically located on or near the fuel rail, the fuel pressure regulator operates by managing the flow of fuel from the fuel tank to the engine. It does this through a diaphragm mechanism that adjusts the fuel flow based on the pressure within the fuel rail. When the fuel pressure exceeds a predetermined level, the regulator opens a bypass valve, allowing excess fuel to return to the fuel tank. Conversely, if the fuel pressure drops, the valve closes to maintain adequate pressure for optimal engine performance.
A well-functioning fuel pressure regulator ensures efficient combustion, leading to better fuel economy, reduced emissions, and overall improved engine performance. If the regulator fails, it can lead to various issues such as hard starting, rough idling, or poor acceleration due to either too much or too little fuel reaching the engine. Therefore, regular maintenance and timely replacement of a faulty fuel pressure regulator are essential for the longevity and efficiency of the vehicle.