
Repairing a transmission fluid leak on a Mercedes-Benz S-Class S500 W222 4MATIC requires careful attention to detail and the use of specific tools. View and download the manual with one click here……
- S550 Mercedes wrap removal.
- 2014-2020 Mercedes-Benz S 550 Front Suspension Conversion Kit Installation This video highlights installation of a Strutmasters suspension conversion kit on the FRONT two wheels of a Mercedes S 550.
Here’s a step-by-step guide:
– **Safety Precautions**
– **Protective Gear**: Wear safety glasses and gloves to protect against spills and debris.
– **Work Area**: Ensure you are working in a well-ventilated area and on a flat, level surface.
– **Tools and Equipment Needed**
– **Jack and Jack Stands**: To safely lift and support the vehicle.
– **Drain Pan**: For catching any fluid that may leak out during the repair.
– **Socket Set**: Metric sockets to remove bolts from the transmission pan, bellhousing, or other components.
– **Torque Wrench**: To ensure bolts are tightened to manufacturer specifications.
– **Screwdrivers**: Flathead and Phillips for any clips or fasteners.
– **Pliers**: For hoses or clamps that may need to be removed.
– **Oil Filter Wrench**: If the transmission filter needs to be changed.
– **Transmission Fluid**: OEM-spec fluid for refilling the transmission after repair.
– **Sealing Gasket or RTV Silicone**: To seal any joints that may be leaking.
– **Flashlight or Work Light**: To illuminate the work area, especially under the vehicle.
– **Identifying the Leak**
– **Visual Inspection**: Check for fluid stains on the ground or under the vehicle.
– **Component Examination**: Inspect the transmission pan, seals, and hoses for any signs of wetness or dripping.
– **Use of a UV Dye**: If necessary, add UV dye to the transmission fluid, run the vehicle, and use a UV light to locate the leak.
– **Accessing the Transmission**
– **Raise Vehicle**: Use a jack to lift the vehicle and secure it with jack stands.
– **Remove Underbody Covers**: If applicable, remove any plastic covers or shields that obstruct access to the transmission.
– **Draining the Transmission Fluid**
– **Position Drain Pan**: Place the drain pan under the transmission pan.
– **Remove Drain Plug or Pan Bolts**: If the transmission has a drain plug, remove it. If not, carefully unbolt the transmission pan.
– **Allow Fluid to Drain**: Let the fluid completely drain into the pan.
– **Inspecting the Transmission Pan and Gasket**
– **Examine the Pan**: Look for cracks or damage that could be causing the leak.
– **Check the Gasket**: If the gasket is worn or damaged, it will need to be replaced. Clean the mating surfaces of the pan and transmission.
– **Replacing the Transmission Filter (if needed)**
– **Remove Old Filter**: If the filter is accessible, remove it using the appropriate tool.
– **Install New Filter**: Place a new filter in accordance with manufacturer specifications.
– **Reassembling the Transmission**
– **Install New Gasket**: Place a new gasket on the transmission pan or apply a bead of RTV silicone as per OEM guidelines.
– **Reattach Transmission Pan**: Secure the pan back into place with the bolts, using a torque wrench to tighten them to the specified torque settings.
– **Refilling Transmission Fluid**
– **Locate Dipstick or Fill Port**: access the transmission fluid dipstick or fill port.
– **Add New Fluid**: Using a funnel, pour in the appropriate amount of OEM transmission fluid. Refer to the owner’s manual for the correct type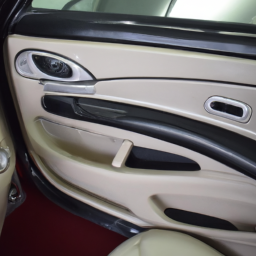 and quantity.
– **Check for Leaks**
– **Start the Engine**: Allow the vehicle to idle for a few minutes and check for leaks around the transmission pan and any other areas worked on.
– **Check Fluid Level**: With the engine running, check the transmission fluid level using the dipstick. Add more fluid If necessary.
– **Final Inspection**
– **Lower Vehicle**: Carefully remove the jack stands and lower the vehicle.
– **Test Drive**: Take the vehicle for a short drive to ensure smooth shifting and no leaks.
– **Routine Maintenance**
– **Periodic Checks**: Regularly inspect for any signs of transmission fluid leaks and check fluid levels to ensure optimal performance.
This guide provides a comprehensive approach to repairing a transmission fluid leak on a Mercedes-Benz S-Class S500 W222 4MATIC. Always consult the vehicle’s service manual for specific details and torque specifications.
The timing belt is a crucial component in an internal combustion engine, serving as a vital link between the engine’s crankshaft and camshaft(s). Its primary function is to synchronize the rotation of these components, ensuring that the engine’s valves open and close at the correct times during the engine cycle. This synchronization is essential for optimal engine performance, efficiency, and to prevent engine damage.
Typically made from a durable rubber material reinforced with fibers, the timing belt features teeth that engage with toothed pulleys on the crankshaft and camshaft. This design allows for precise timing and minimal slippage, which is vital for maintaining the engine’s operational integrity. Timing belts come in various sizes and lengths, tailored to fit specific engine configurations.
One of the key advantages of timing belts over other timing mechanisms, like timing chains, is their quieter operation and lighter weight. However, they do have a finite lifespan and are subject to wear and tear, often requiring replacement at manufacturer-recommended intervals, usually between 60,000 to 100,000 miles. Neglecting to replace a worn timing belt can lead to catastrophic engine failure, as the belt may break, causing the engine’s pistons to collide with open valves, resulting in significant damage. Therefore, regular maintenance and timely replacement are essential for ensuring the longevity and reliability of an engine.