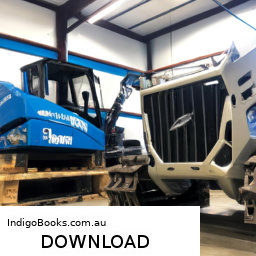
Controlling arm replacement on a Bobcat X 225 requires careful attention to detail and proper tools. For full details, download the manual by clicking here…..
- Their Boat Engine Fell Off This is the hilarious moment a motor suddenly snapped off a boat as it was speeding around the waters off Long Island in New …
- 🌊🚤 Don’t you just love the motion of the ocean? Boat size matters when the waves toss you…
Here’s a detailed guide outlining the process, along with descriptions of the tools needed:
– **Safety Precautions**
– **Personal Protective Equipment (PPE)**: Always wear safety goggles, gloves, and steel-toed boots to protect yourself while working on machinery.
– **Work Area**: Ensure the work area is clean, organized, and well-lit to prevent accidents.
– **Tools Required**
– **Socket Set**: A complete metric and standard socket set is necessary for removing bolts and nuts. Ensure you have a ratchet and various extensions for hard-to-reach areas.
– **Wrench Set**: Both open-end and box-end wrenches are important to tighten or loosen hardware, especially in tight spaces.
– **Pry Bar**: Used for leveraging and removing the old control arm from its mounting points.
– **Jack and Jack Stands**: A hydraulic jack is needed to lift the Bobcat for easier access to the control arms. Jack stands are vital for safely supporting the machine while you work.
– **Torque Wrench**: This tool ensures that bolts are tightened to the manufacturer’s specifications, preventing future issues.
– **Hammer**: A rubber or dead-blow hammer can help dislodge stubborn components without damaging them.
– **Grease Gun**: To lubricate the new control arm bushings and joints during installation.
– **Shop Manual**: A service manual specific to the Bobcat X 225 provides detailed diagrams and specifications for replacement procedures.
– **Preparation Steps**
– **Disconnect the Battery**: Ensure the machine is off and disconnect the battery to prevent any electrical issues or accidental starts.
– **Lift the Machine**: Use the hydraulic jack to lift the Bobcat, then place jack stands under the frame for safety.
– **Remove the Wheel (if necessary)**: Depending on access, you may need to remove the wheel on the side of the control arm being replaced.
– **Removing the Old control Arm**
– **Locate Mounting Bolts**: Identify the bolts securing the control arm to the frame and the wheel assembly.
– **Loosen Bolts**: Using the socket set and wrench, start with the bolts at the wheel assembly and then proceed to the frame bolts. Apply penetrating oil if bolts are rusted or stuck.
– **Remove Bolts**: Once loosened, completely remove the bolts and set them aside for later use.
– **Detach control Arm**: Use the pry bar to gently detach the control arm from its mountings. Be cautious to avoid damaging surrounding components.
– **Inspect and Clean**: Check the mounting points for any debris or damage and clean these areas to ensure proper installation of the new arm.
– **Installing the New control Arm**
– **Prepare the New control Arm**: Before installation, lubricate the bushings and joints of the new control arm with a grease gun to enhance performance and longevity.
– **Position the control Arm**: Align the new control arm with the mounting points on the frame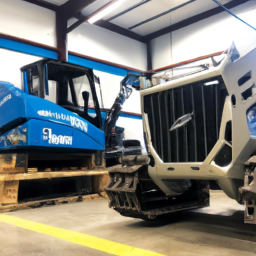 and the wheel assembly.
– **Insert Bolts**: Hand-tighten the bolts to hold the control arm in place. Start with the bolts for the frame, then move to the wheel assembly.
– **Torque to Specification**: Use a torque wrench to tighten the bolts to the manufacturer’s specifications, ensuring everything is secure.
– **Reassembly**
– **Reattach the Wheel**: If you removed the wheel, reattach it and torque the lug nuts to the recommended specifications.
– **Lower the Machine**: Carefully remove the jack stands and lower the Bobcat back to the ground using the hydraulic jack.
– **Reconnect the Battery**: Reconnect the battery terminals ensuring they are tight and secure.
– **Final Checks**
– **Test the control Arm**: Before putting the Bobcat back into regular service, check the movement of the new control arm and ensure there are no obstructions or unusual noises.
– **Perform a Test Drive**: If possible, take the Bobcat for a short test drive to ensure proper functionality and alignment.
– **Documentation**
– **Update Maintenance Records**: Document the replacement procedure, including any parts used and any observations made during the process.
By following this detailed guide, you can successfully replace the control arms on a Bobcat X 225, ensuring that your equipment remains safe and efficient for use.
A spark plug is a crucial component in the internal combustion engine of gasoline-powered vehicles. Its primary function is to ignite the air-fuel mixture within the engine’s combustion chamber, which leads to the power generation required for the vehicle to operate. Spark plugs are typically made of a metal shell and contain a central electrode insulated by a ceramic insulator.
When the engine is running, the ignition system sends a high-voltage electrical current to the spark plug, creating a spark at the gap between the central electrode and the ground electrode. This spark ignites the compressed air-fuel mixture, causing a small explosion that pushes the piston down in the engine cylinder and ultimately generates power to turn the vehicle’s crankshaft.
Spark plugs come in various designs and materials, including copper, platinum, and iridium, each offering different advantages in terms of performance, longevity, and heat dissipation. They are designed to operate under extreme conditions, withstanding high temperatures and pressures.
Regular maintenance of spark plugs is essential for optimal engine performance and fuel efficiency. Worn or fouled spark plugs can lead to poor engine performance, increased emissions, and reduced fuel economy. Therefore, replacing spark plugs according to the manufacturer’s recommendations is vital to ensure the smooth operation of the vehicle and to prevent potential engine issues.