Replacing the transmission pump on a Kobelco 235SR excavator can seem daunting, especially if you have little mechanical experience. Click here to access the detailed manual download……
- Kobelco SK220LC-3 Hydraulic Pump Control Panel 2480U332F2 Shop all your tough equipment needs: https://bit.ly/4citamz Subscribe and ring the notification bell!
- KOBELCO 235SRLC SK235SR SK235SRLC YN10V00008F1 PUMP KAWASAKI K3V112DP-111R-9R0D
However, with the right tools and a step-by-step approach, you can tackle this task. Here’s a simplified guide to help you through the process:
### Tools and Materials Needed
1. **Basic Hand Tools**: Wrenches, sockets, and screwdrivers.
2. **Pliers**: For removing any clamps or small parts.
3. **Torque Wrench**: To ensure bolts are tightened to the correct specifications.
4. **Clean Rags**: For wiping off any fluids and cleaning parts.
5. **New Transmission Pump**: Make sure it’s compatible with your Kobelco 235SR.
6. **Gaskets and Seals**: These may need to be replaced as well.
7. **Fluid**: New transmission fluid to refill after the replacement.
### Safety First
– **Turn Off the Machine**: Make sure the excavator is turned off and parked on a stable surface.
– **Wear Safety Gear**: Use gloves and safety glasses to protect yourself from any fluids or sharp edges.
### Step-by-Step Guide
1. **Prepare the Excavator**:
– Ensure the machine is on a flat surface and the engine is cool.
– Disconnect the battery to avoid any electrical issues.
2. **Access the Transmission Pump**:
– Locate the transmission pump. It’s usually found near the transmission housing.
– You may need to remove some panels or components to gain better access. Take note of how parts are connected so you can reassemble them later.
3. **Drain the Transmission Fluid**:
– Place a drain pan under the transmission to catch any fluid.
– Remove the drain plug and let the fluid completely drain out. this step prevents spills when you remove the pump.
4. **Disconnect the Pump**:
– Locate the bolts or screws securing the pump in place. Use the appropriate wrench or socket to remove them.
– Carefully Disconnect any hoses attached to the pump. You may need pliers to loosen clamps.
– Gently pull the pump away from its housing. Be cautious not to damage any surrounding parts.
5. **Install the New Pump**:
– Ensure the new pump is clean and ready for installation.
– Place a new gasket or seal on the mounting surface to prevent leaks.
– Position the new pump in place and secure it with the bolts you removed earlier. Tighten them to the manufacturer’s specifications using a torque wrench.
6. **Reconnect Hoses and Lines**:
– Reattach any hoses or lines to the new pump. Make sure they are secure and there are no leaks.
– Double-check that all connections are tight and properly aligned.
7. **Refill Transmission Fluid**:
– Replace the drain plug and ensure it’s tight.
– Use a funnel to refill the transmission with new fluid through the designated fill port. Refer to your owner’s manual for the correct type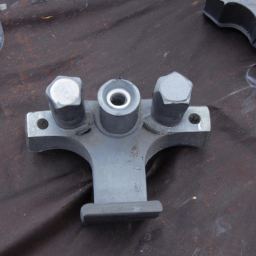 and amount of fluid.
8. **Reconnect the Battery**:
– Once everything is secure and in place, Reconnect the battery.
9. **Test the System**:
– Start the engine and let it run for a few minutes. Check for any leaks around the pump and ensure everything is functioning properly.
– Test the performance of the excavator to ensure the transmission is working as it should.
### Final Tips
– **Keep Everything Organized**: As you disassemble parts, keep track of screws and components. It helps to label or take pictures for reference during reassembly.
– **Consult the Manual**: If you’re unsure about any step, refer to the Kobelco 235SR service manual for specific guidance.
– **Seek Help if Needed**: If at any point you feel overwhelmed, don’t hesitate to ask for help from someone with more mechanical experience.
By following these steps, you should be able to successfully replace the transmission pump on your Kobelco 235SR excavator. Good luck!
An engine mount bracket is a crucial component of a vehicle’s engine mounting system, designed to secure the engine to the chassis of the car. Its primary function is to provide a stable and secure platform that holds the engine in place while simultaneously absorbing vibrations and shocks produced during engine operation. Typically made from durable materials such as steel or reinforced rubber, the engine mount bracket is engineered to withstand the forces generated by the engine, including torque and lateral movements.
The engine mount bracket connects the engine to the vehicle’s frame or subframe, facilitating proper alignment and positioning of the engine within the engine bay. It plays a vital role in maintaining the integrity of the vehicle’s structure by distributing the weight of the engine evenly, thus preventing undue stress on other components. Furthermore, the bracket is designed to accommodate the thermal expansion of the engine and any movement caused by drivetrain dynamics, ensuring that the engine remains securely anchored even during acceleration, deceleration, or cornering.
In addition to its structural role, the engine mount bracket also contributes to the overall driving experience by minimizing engine vibrations that can be transferred to the cabin. By isolating these vibrations, the bracket helps to ensure a smoother ride and enhances passenger comfort. Regular inspection and maintenance of the engine mount bracket are essential, as wear or damage can lead to engine misalignment, increased vibrations, and even potential engine failure if not addressed.