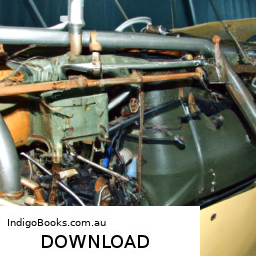
Replacing the input shaft on a KOHLER Command CV493 18HP engine is a detailed process that requires careful attention and mechanical skills. For full details, download the manual by clicking here…..
- Troubleshooting and repairing of main hydraulic control block | Hydraulic control valve repair Troubleshooting and repairing of main hydraulic control block | Hydraulic control valve repair, JCB control valve, JCB control valve …
- Kohler Command 16 HP Single Cylinder CV Series Governor Install and Adjustment This engine is from a John Deere LX266. This will apply to almost all of the Kohler CV Style Engine (Command Vertical Single …
below is a reverse order explanation of the steps involved in this replacement:
### 10. Reassemble the Engine
– **Reinstall the Engine Cover**: Place the engine cover back on, securing it with screws or bolts as needed.
– **Reconnect Any Removed Components**: Reattach any components that were disconnected during the disassembly process, such as the air filter, carburetor, and electrical connections.
### 9. Reinstall the Flywheel
– **Position the Flywheel**: Place the flywheel back onto the crankshaft, aligning it properly.
– **Secure the Flywheel**: Tighten the flywheel nut to the manufacturer’s specified torque settings.
### 8. Reattach the PTO (Power Take-Off) Components
– **Install the PTO Clutch**: If applicable, reinstall the PTO clutch onto the input shaft, making sure it is seated correctly.
– **Reconnect PTO Wiring**: If the PTO has electrical connections, reconnect them securely.
### 7. Replace the Oil Seal
– **Install New Oil Seal**: Before replacing the input shaft, install a new oil seal onto the engine case if it was removed or damaged during the process.
### 6. Insert the New Input Shaft
– **Align the New Shaft**: Carefully insert the new input shaft into the engine case, ensuring it is aligned with the flywheel and crankshaft.
– **Secure the Input Shaft**: Tighten any retaining bolts or screws to hold the input shaft in place securely.
### 5. Remove the Old Input Shaft
– **Extract the Old Shaft**: depending on the design, you may need to pull or slide the old input shaft out of the engine case. make sure to note how it was positioned for correct installation of the new one.
### 4. Disassemble the Engine Components
– **Remove the Engine Cover**: Take off the engine cover to access the internal components.
– **Take Out Components Blocking Access**: Remove any components obstructing access to the input shaft, such as the carburetor, air cleaner, and possibly the flywheel.
### 3. Drain Engine Oil
– **Drain Oil**: Before starting work, drain the engine oil into a suitable container to prevent spills and mess during the replacement.
### 2. Gather Necessary Tools and Parts
– **Collect Tools**: Ensure you have the necessary tools, including wrenches, sockets, screwdrivers, and possibly a puller for the flywheel.
– **Obtain Replacement Parts**: Acquire a new input shaft and any seals or gaskets that may need replacement.
### 1. Safety Precautions
– **Disconnect the Battery**: Always disconnect the battery to prevent accidental starts.
– **Work in a Safe Environment**: Ensure your workspace is clean and organized to avoid losing parts and tools.
### Conclusion
This reverse order guide provides a structured approach for replacing the input shaft on a KOHLER Command CV493 engine. Always refer to the manufacturer’s service manual for specific torque values, diagrams, and additional safety procedures. If you’re not comfortable with this level of mechanical work, consider consulting a professional mechanic.
A tire repair kit is an essential automotive accessory designed to address minor tire issues, particularly punctures, that can occur while driving. These kits are especially useful for individuals who prefer to tackle emergencies on their own without waiting for roadside assistance. Typically compact and portable, a tire repair kit is easy to store in the trunk or glove compartment of a vehicle.
A standard tire repair kit usually includes several key components. The most common items are puncture repair plugs or patches, which are used to seal small holes in the tire tread caused by nails, screws, or other sharp objects. Many kits also come with a reamer tool, which prepares the puncture for the insertion of the repair plug, and a insertion tool to help place the plug securely within the tire. Additionally, some kits may include a tire pressure gauge to check the tire’s inflation level after the repair, and a portable air compressor for reinflating the tire if it has lost pressure.
In some cases, tire repair kits may also feature a sealant that can be injected into the tire to seal leaks from the inside. This can provide a temporary fix until a more permanent solution, such as replacing the tire, can be implemented. Overall, a tire repair kit serves as a convenience and safety measure for drivers, enabling them to quickly address flat tires and continue their journeys with minimal disruption.