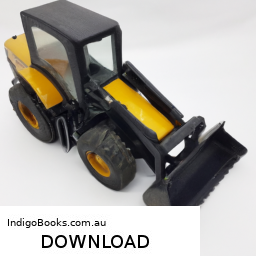
Replacing the blower motor on JCB Wheel Loaders (models 410, 412, 415, 420, 425, and 430) involves several steps. For full details, download the manual by clicking here…..
Here’s a reverse order breakdown of the process:
### 7. Reassemble the Components
– **Reconnect the Battery**: Ensure that the battery is reconnected securely.
– **Reinstall any removed panels or covers**: If you had to remove any panels to access the blower motor, reinstall them now.
– **Secure all screws and clips**: Make sure everything is tightened and secured.
### 6. test the New Motor
– **Turn on the Ignition**: Start the loader and test the new blower motor to ensure it operates correctly.
– **Check for Proper Airflow**: Make sure the airflow is strong and directed appropriately.
### 5. Install the New Blower Motor
– **Align the Blower Motor**: Place the new blower motor into its housing, ensuring it aligns with the mounting points.
– **Secure the Motor**: Fasten any screws or bolts that hold the motor in place.
– **Reconnect Electrical Connections**: Attach the Wiring harness to the blower motor, ensuring a snug fit.
### 4. Remove the Old Blower Motor
– **Disconnect Electrical Connections**: Carefully unplug the Wiring harness from the old blower motor.
– **Unscrew the Old Motor**: Remove any screws or bolts securing the old motor in place.
– **Extract the Motor**: Carefully pull the old blower motor out of its housing.
### 3. Prepare for Installation
– **Access the Blower Motor**: Depending on the model, you may need to remove a cover or panel to access the blower motor.
– **Ensure a Clean Workspace**: Make sure the area around the blower motor is clean and free of debris.
### 2. Gather Tools and Parts
– **Acquire the Replacement Motor**: Make sure you have the correct blower motor for your specific JCB model.
– **Collect Necessary Tools**: You may need screwdrivers, wrenches, and possibly a socket set for the installation.
### 1. Safety First
– **Turn off the Loader**: Ensure the wheel loader is turned off and parked on a flat surface.
– **Disconnect the Battery**: Remove the negative terminal of the battery to prevent any accidental electrical issues during the replacement.
By following these steps in reverse order, you can successfully replace the blower motor on JCB wheel loaders 410, 412, 415, 420, 425, and 430. Always refer to the specific service manual for your model for detailed guidance and safety precautions.
The driveshaft is a critical component in a vehicle’s drivetrain, responsible for transmitting torque and rotational power from the engine to the wheels, enabling the vehicle to move. It is a long, cylindrical rod that connects the transmission to the differential, which then distributes this power to the wheels. Typically made from materials such as steel or aluminum, the driveshaft is engineered to withstand high levels of torque and is designed to be both strong and lightweight to enhance vehicle performance.
One of the key functions of the driveshaft is to accommodate the distance between the transmission and the differential, which can vary in different vehicle designs. In many vehicles, especially those with rear-wheel drive, the driveshaft must also handle the alignment and angular changes as the vehicle moves over uneven surfaces or during cornering. To facilitate this, driveshafts often incorporate universal joints, which allow for flexibility and articulation while maintaining a strong connection.
Driveshafts can vary in design depending on the type of vehicle. For instance, in front-wheel-drive vehicles, the power is typically transmitted through half shafts, which serve a similar purpose but are configured differently due to the engine’s orientation. Proper maintenance of the driveshaft is essential, as wear and tear can lead to vibrations, noise, or even failure, which could severely impact vehicle performance and safety. Understanding the importance of the driveshaft can help vehicle owners appreciate its role in the overall mechanics of their cars.