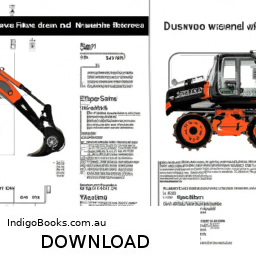
Certainly! Click here to access the detailed manual download……
- THOMAS T175 For Sale http://www.machinerytrader.com/listingsdetail/detail.aspx?OHID=10700621 Title: THOMAS T175 For Sale Category: Skid Steers.
- 🛠️Learn how to change the hydraulic oil filter on your excavator. #oilfilter Learn how to change the hydraulic oil filter on your excavator. If your excavator’s hydraulic filter is clogged, it can cause the pump …
Replacing the clutch master cylinder on a Daewoo Doosan SOLAR 210W V Wheel Excavator is a comprehensive task that requires a good understanding of hydraulic systems and the specific components involved. The clutch master cylinder plays a crucial role in the vehicle’s clutch system, enabling the driver to engage and disengage the clutch smoothly. Below, I’ll provide a detailed step-by-step explanation of the process, including the tools needed for the job.
### Tools and Materials Required:
1. **Basic Hand Tools:**
– **Socket Set**: A ratchet and socket set (both metric and imperial) will be essential for removing bolts and nuts of various sizes.
– **Wrenches**: An adjustable wrench and a set of combination wrenches will be useful for accessing hard-to-reach areas.
– **Screwdrivers**: A flathead and Phillips screwdriver for any clips or connectors that may need to be removed.
2. **Hydraulic Tools:**
– **Brake Bleeder Kit**: This will be necessary to bleed the hydraulic system after you replace the master cylinder.
– **Pliers**: Needle-nose pliers can help with removing clips or hoses.
3. **Safety Gear:**
– **Safety Glasses**: Protect your eyes from any hydraulic fluid or debris.
– **Gloves**: Use mechanic’s gloves to keep your hands clean and protected.
4. **Replacement Parts:**
– **New Clutch Master Cylinder**: Ensure that it is compatible with the Daewoo Doosan SOLAR 210W V model.
– **Clutch Hydraulic Fluid**: Check your manual for the specific type required.
5. **Cleaning Supplies:**
– **Rags**: To wipe up any spills and keep the workspace clean.
– **Brake Cleaner**: For cleaning old fluid and debris from the area around the master cylinder.
### Step-by-Step replacement Process:
#### Step 1: Preparation
– **Safety First**: Before beginning, ensure that the excavator is parked on a flat surface, and the engine is turned off. Engage the parking brake to prevent any movement.
– **Disconnect the Battery**: Remove the negative terminal from the battery to eliminate any risk of electrical shock or short circuits.
#### Step 2: Accessing the Clutch Master Cylinder
– **Locate the Clutch Master Cylinder**: The clutch master cylinder is usually mounted on or near the firewall of the excavator. Consult the service manual for the exact location.
– **Remove Obstructions**: If there are any covers or components obstructing access to the master cylinder, carefully remove them using your socket set and wrenches. Keep track of all screws and components for reassembly.
#### Step 3: Disconnecting the Old Clutch Master Cylinder
– **Disconnect Hydraulic Lines**: Using the appropriate wrench, carefully disconnect the hydraulic lines attached to the master cylinder. Be prepared for some hydraulic fluid to spill out; use rags to catch any fluid.
– **Remove the Mounting Bolts**: Using the socket set, remove the bolts securing the master cylinder to its mounting bracket. Note the orientation of the cylinder for easier installation of the new one.
– **Take Out the Old Master Cylinder**: Once the bolts are removed, carefully pull the old master cylinder out of its mounting position.
#### Step 4: Installing the New Clutch Master Cylinder
– **Prepare the New Cylinder**: Before installation, check the new master cylinder for any defects and ensure all ports are clean. If applicable, lubricate the seals with a bit of hydraulic fluid to ensure a smooth fit.
– **Install the New Cylinder**: Position the new master cylinder in the same orientation as the old one. Secure it using the original mounting bolts and tighten them with the socket set.
– **Reconnect Hydraulic Lines**: Reattach the hydraulic lines to the new master cylinder, ensuring they are tight to prevent leaks.
#### Step 5: Bleeding the Hydraulic System
– **Fill the Reservoir**: Fill the clutch master cylinder reservoir with the appropriate hydraulic fluid as specified in the operation manual.
– **Bleed the System**: Use a brake bleeder kit to remove air from the hydraulic lines. This typically involves one person pumping the clutch pedal while another opens and closes the bleeder valve on the slave cylinder until no air bubbles are seen in the fluid.
#### Step 6: Final Checks and Reassembly
– **Check for Leaks**: With the system bled, check all connections for leaks by applying pressure to the clutch pedal and inspecting the hydraulic lines.
– **Reassemble Any Removed Components**: Replace any covers or components that were removed to access the master cylinder.
– **Reconnect the Battery**: Reattach the negative terminal of the battery, ensuring it is secure.
#### Step 7: Testing
– **Test the Clutch Operation**: Start the excavator and test the clutch operation. The pedal should feel firm and engage/disengage smoothly. If there are any issues, recheck your hydraulic connections and the bleed process.
### Conclusion
Replacing the clutch master cylinder in a Daewoo Doosan SOLAR 210W V Wheel Excavator is a detailed process that requires careful attention to detail and an understanding of the hydraulic system. By following these steps and using the proper tools, you can successfully complete the replacement and ensure that the excavator operates smoothly and efficiently. Always refer to the specific operation manual for any additional details or specifications unique to your model. Happy wrenching!
The clutch fork, an essential component of a vehicle’s manual transmission system, plays a pivotal role in the engagement and disengagement of the clutch. Typically made from sturdy metals like steel or aluminum, the clutch fork is designed to endure the significant forces involved in the operation of the clutch assembly. Its primary function is to transfer the motion from the clutch pedal to the release bearing, which, in turn, disengages the clutch from the engine’s flywheel when the driver presses the pedal.
When the driver presses the clutch pedal, the clutch fork pivots on a specific point, applying pressure to the release bearing. This action pushes the bearing against the pressure plate of the clutch assembly, effectively separating the clutch disc from the flywheel. This disengagement allows the driver to shift gears smoothly without damaging the transmission.
Clutch forks come in various designs, including single and dual fork configurations, depending on the vehicle’s specific requirements. Over time, due to wear and tear or environmental factors, the clutch fork can become damaged or bent, leading to issues such as difficulty in shifting gears or even clutch failure. Regular inspection and maintenance of the clutch fork, along with the entire clutch system, are crucial for ensuring optimal vehicle performance and longevity. Understanding its function and importance can help drivers recognize potential issues before they escalate, ultimately enhancing safety and driving experience.