
Repairing the alternator on a Komatsu WA250-6 or WA250PZ-6 Wheel Loader can seem daunting, but by breaking it down into simple steps, it can be manageable even for someone with little mechanical experience. Find all the information you need in the download manual……
- 2011 Komatsu WA250PZ-6 Wheel Loader I St Aubin, France Auction – 5 & 6 July Ritchie Bros. is a global asset management and disposition company, offering customers end-to-end solutions for buying and …
- KOMATSU WA250PZ-6 U199163C I created this video with the YouTube Video Editor (http://www.youtube.com/editor)
Here’s a straightforward guide to help you through the process.
### Tools and Materials Needed:
– Basic hand tools (wrenches, sockets, screwdrivers)
– A multimeter (for testing electrical components)
– Replacement alternator or parts (if needed)
– Safety gloves and goggles
– Cleaning cloth
### Steps to Repair the Alternator:
1. **Safety First:**
– Make sure the wheel loader is parked on a flat surface and the engine is turned off.
– Engage the parking brake and disconnect the battery by removing the negative terminal. this prevents any electrical shock or short circuits while you are working.
2. **Locate the Alternator:**
– Open the engine compartment. The alternator is typically mounted on the engine and is a cylindrical component with wires and a belt connected to it.
– Refer to the operator’s manual for its exact location if needed.
3. **Inspect the Alternator:**
– Look for signs of damage such as cracks, corrosion, or loose connections.
– Check the wiring for frays or breaks and ensure all connections are secure. If you find damaged wires, they may need to be replaced.
4. **Test the Alternator:**
– Use a multimeter to check the voltage output of the alternator. With the engine running, you should see a voltage reading between 13.5 to 14.5 volts. If it’s outside this range, the alternator may be faulty.
5. **Remove the Alternator:**
– If you determine that the alternator needs to be replaced, start by loosening the belt tension using the tensioner or by loosening the bolts that hold the alternator in place.
– Carefully remove the drive belt from the alternator pulley.
– Disconnect the electrical connectors from the alternator. Note where each Wire connects for reinstallation.
– Finally, remove the mounting bolts holding the alternator in place and take the alternator out.
6. **Install the New or Repaired Alternator:**
– Position the new or repaired alternator into place and secure it with the mounting bolts. Make sure it’s snug but don’t overtighten.
– Reconnect the electrical connectors, ensuring they match the original setup.
7. **Reattach the Drive Belt:**
– Loop the drive belt back around the alternator pulley and any other pulleys it was on. adjust the tensioner or tighten the bolts as necessary to ensure the belt is tight but not overly so.
8. **Reconnect the Battery:**
– Reconnect the negative terminal of the battery. Ensure all connections are tight.
9. **Test the System:**
– Start the engine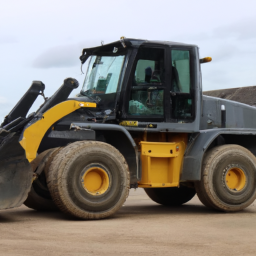 and observe the alternator. Check for any unusual noises or vibrations.
– Use the multimeter again to verify that the output voltage is within the correct range.
10. **Complete the Job:**
– If everything is functioning properly, close the engine compartment.
– Clean up your tools and workspace.
### Final Tips:
– Always refer to the operator’s manual for specific instructions related to your model.
– If you feel uncomfortable at any stage, consider seeking professional help.
– Regular maintenance of the alternator can prevent future issues, so keep an eye on the electrical system of your wheel loader.
By following these steps carefully, you can successfully repair or replace the alternator on your Komatsu WA250-6 or WA250PZ-6 Wheel Loader. Remember, patience and attention to detail are key!
An odometer is a crucial component found in vehicles that measures the distance traveled by the vehicle over its lifespan. Typically integrated into the dashboard, the odometer provides drivers with essential information regarding the total mileage the vehicle has covered, which is vital for various purposes, including maintenance scheduling, resale value assessment, and fuel efficiency monitoring.
There are two primary types of odometers: mechanical and digital. Mechanical odometers operate using a series of gears and rotating dials, where each rotation corresponds to a specific distance traveled, traditionally measured in miles or kilometers. As the vehicle moves, the motion is translated into numerical increments displayed on the odometer face. Digital odometers, on the other hand, utilize electronic sensors and microprocessors to track distance and display it in a numerical format on an LCD or LED screen. this modern approach allows for additional features, such as trip meters that can be reset independently to track specific journeys.
Odometers also play a significant role in vehicle maintenance. Regular service intervals are often recommended based on mileage, making accurate odometer readings essential for keeping up with maintenance schedules. Additionally, when selling or purchasing a used vehicle, the odometer reading is a key factor in determining the vehicle’s value and condition. Overall, the odometer is an indispensable instrument that contributes to the safe and efficient operation of vehicles.